How to create a YouTube channel that gets views

When you’re looking for ways to expand your business and you’ve already got your social media channels set up and you’re successfully growing your followers on those channels, you’ll be looking for the next thing to keep expanding your business. Creating a YouTube channel can help you to increase brand awareness, which in turn can increase traffic to your website and product listings, which means bigger profits! Since 89% of video marketers say that video gives them good ROI, it can be well worth taking the time to create videos for your business.
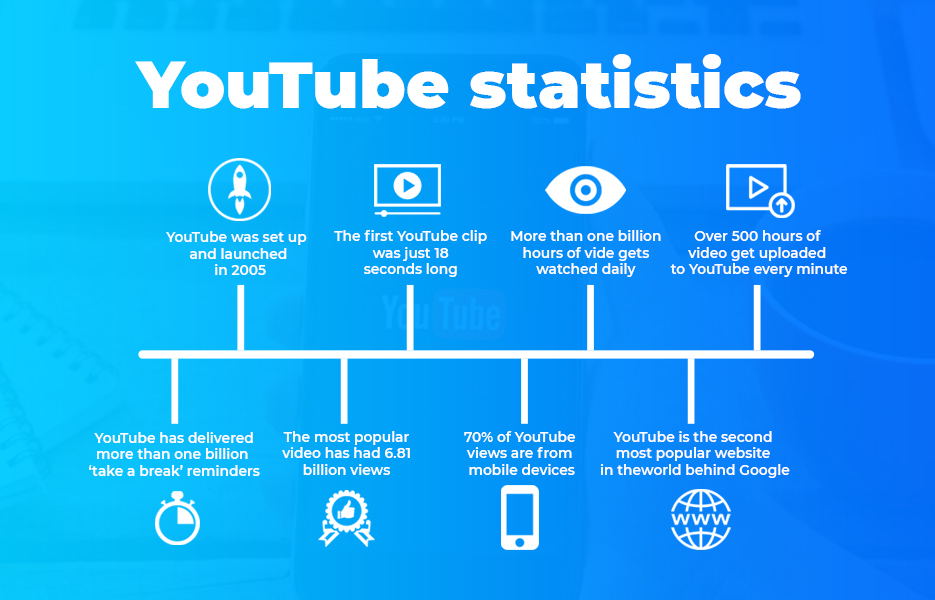
YouTube statistics
How to set up your YouTube account
You can’t start uploading to YouTube until you’ve set your account up properly! Doing this now will ensure your account is correctly set up, and that you’re able to set up your branding to reflect your business.
Your YouTube account is actually a Google account – because Google has owned YouTube since 2006. Whether you already have a Google account or not, you’ll be able to simply go to YouTube and click the Sign In button in the top right hand corner of the page. If you have a Google account, you simply sign in with that account.
If you don’t yet have a Google account, you’ll need to click Create Account, and then choose from ‘For myself’ or ‘To manage my business’. From there, simply follow the steps to get your account, and get yourself signed in – then you can get started with customising your account to show off your business branding.
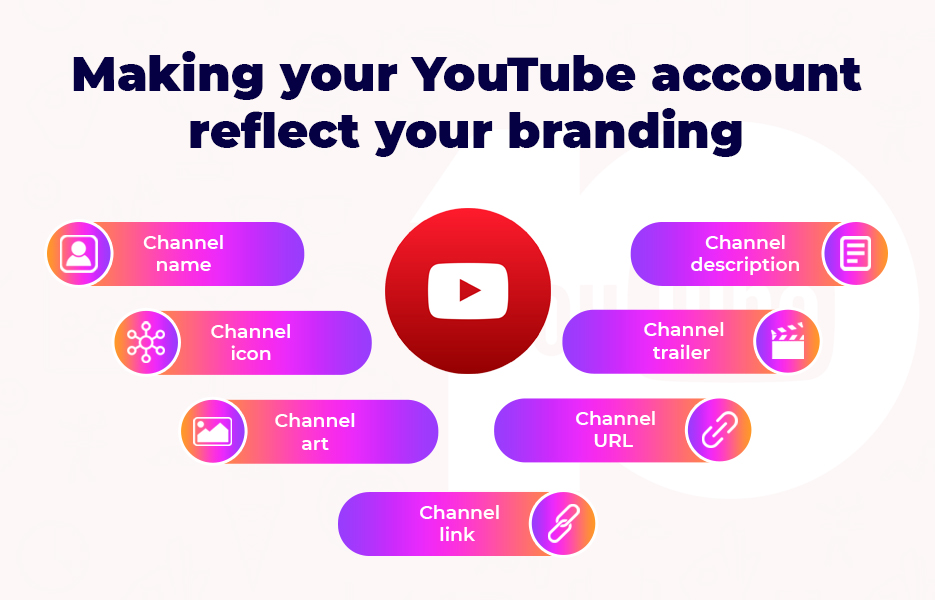
Making your YouTube account reflect your branding
If your YouTube channel is there to increase brand awareness and to help you reach your customers, you’ll need to ensure you set up your account so that your customers recognise it as being linked to your business. Once your Google account is set up and ready to go, these are the steps to take next.
Channel name
This is pretty logical – you want your videos to have the name of your business on it. That means you’ll be looking to get the same name for your YouTube channel as your business, or to match your other social media channels. Your YouTube subscribers are very likely to follow you on other social media channels, so be sure it is easy for followers to identify you – because your followers will then be able to become your customers.
Channel icon
Ideally, you’ll be using your brand logo here, because it will be your logo across all your Google properties, but there may be times that you decide to switch this up, such as many businesses do during Pride month, or adding a poppy to your logo in the first two weeks of November. These aren’t the only occasions of course – you can switch it whenever your business needs to. Your channel icon needs to be 800 x 800 pixel square, or a round image.
Channel art
This is a bigger image that you can work with – you get 2560 x 1440 pixels, and it scales across devices of all shapes and sizes (including TVs!) so be sure whatever you choose here represents your brand appropriately.
Channel description
Your channel description should provide an explanation of what your company does, the type of content you’ll be uploading and where subscribers can find you. You don’t have to be too wordy here, but it’s an opportunity to show your company off, so don’t waste it!
Channel trailer
Channel trailers are exactly that – an advert showing off your channel. It’s a short video – between 30 and 60 seconds is just right. YouTube won’t add any extra adverts to your channel trailer, so make the most of it and show why your channel is great and give some reasons to subscribe.
Channel URL
Once you have been posting for more than 30 days and you have more than 100 subscribers, you may be able to get your hands on a customer YouTube URL. This makes for a much more impressive way to promote your YouTube channel elsewhere. Ours is @avasamsocial if you’d like to go subscribe!
Channel links
We talk about cross promoting your social media channels all the time – talking about your Instagram on your Facebook posts, or reminding your followers on Snapchat to follow the fun on TikTok. This is where you can do exactly that on your YouTube channel – so be sure you add all your other social media channels here, and don’t forget to add the link to your website too.
8 great reasons to set up a YouTube channel
There are loads of different reasons that might apply to your business specifically, but here are some of the main reasons that businesses create their YouTube channel.
- There is tonnes of traffic already heading to YouTube. If users like the same sort of content you’re creating, the algorithm will show them your content too.
- Using YouTube will help your videos be shown on Google search results – which means increased brand awareness.
- YouTube content never dies – if it is relevant and viewers are still commenting after months or years, it will still be featured by the algorithm.
- Posting your videos on YouTube will help raise the profile of your company internationally.
- You can increase your followers on your other social media channels, and add to your email list when you’re using YouTube.
- Your YouTube audience is likely to share your content on their social media accounts.
- Viewers who like your content are likely to buy from you.
- You can monetise your content on YouTube – find out more on our blog post here.
Types of videos to create for your YouTube channel
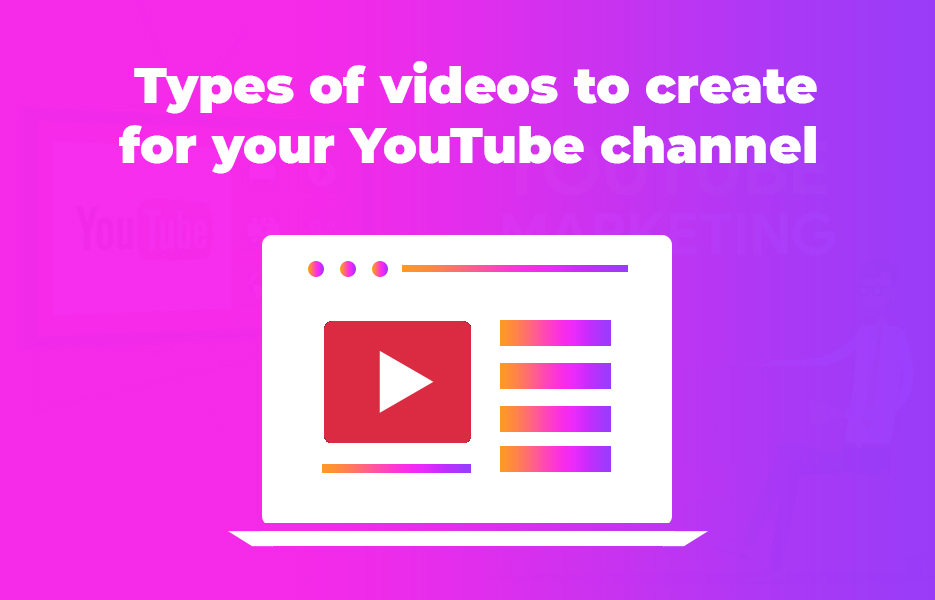
If you’re creating a YouTube channel to promote your DropShipping business, or any other kind of eCommerce business, these are some of the types of videos that brands create that perform the best.
Stories: Tell the story of how your brand came to be, of what inspired a product or how a product made a difference to a customer’s life.
Tutorials: Create ‘how to’ guides – many people watch demonstrations to find out more than reading instructions.
Animations: If you’re camera shy, try putting together an animated video instead.
Setup guides: Showing customers how easy a product is to install and use will help to increase sales of that product.
Testimonials: Review videos can increase the social credibility of your brand – if you put it on film it becomes even more trustworthy!
Expert interviews: Ask an expert, or an influencer to talk about your products and your brand for even greater social credibility.
Close-ups: If you have intricate, or beautiful products, give them a close-up to increase your sales.
Kit to create videos for YouTube
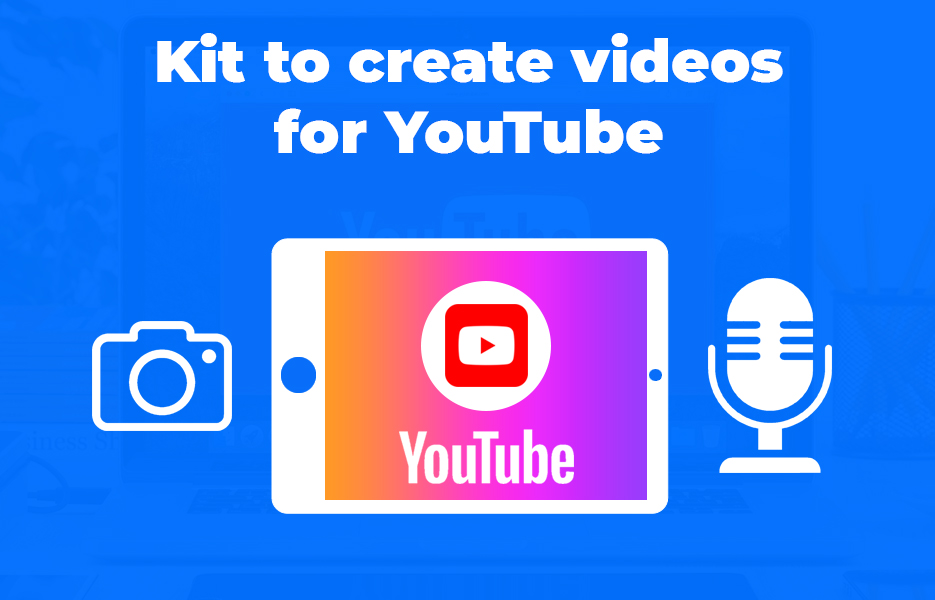
Although many professionals, including influencers will invest in their equipment for recording their YouTube videos, depending on the type of content you’re creating you might not need to go that far. The camera and microphone on your smartphone might be enough to get you started, but in the longer term you might want to consider investing in cameras, microphones, lighting rigs or editing software – although as we spoke about in a couple of our blog posts, you might find that the free editing software that is available is just what you need.
Steps to making a great YouTube video
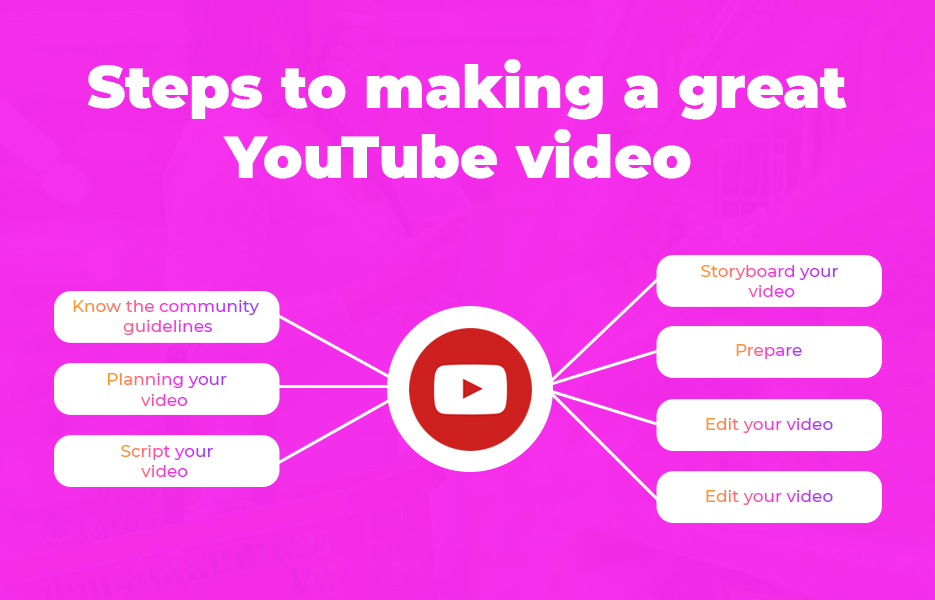
Before you get started, it’s well worth knowing the processes that can help to ensure your video is successful. Here are our recommendations to get you started.
Know the community guidelines
It might be obvious to most of us, but we’re just going to put it in for the sake of covering you – you should make sure that you always adhere to the YouTube Community Guidelines. They’re really easy to read and understand, and if you’re using YouTube for your business, it is unlikely that you’ll be creating any type of content that will break those guidelines. But it is a really good idea to make sure that you’re aware, take a couple of minutes just to give them a quick once-over.
If you happen to break the YouTube guidelines, you’re going to end up with your account disabled – which obviously isn’t going to lead to any kind of success! Here is the part of the Community Guidelines that you’ll need to be aware of here:
If a YouTube creator’s on- and/or off-platform behaviour harms our users, community, employees or ecosystem, we may respond based on a number of factors including, but not limited to, the egregiousness of their actions and whether a pattern of harmful behaviour exists. Our response will range from suspending a creator’s privileges to account termination.
If you’re playing with edgy ideas, or you’re using humour that could be offensive, tread carefully. When you’re creating content that potential customers will encounter, you don’t want to exclude anyone who could be about to spend money with you – even if you do mean whatever you’re posting as a joke.
Planning your video
Since there is so much competition for your videos to be seen on YouTube, your videos need to be good. That means generally, until you’re much more established at least, you’ll want to avoid simply stepping in front of the camera and hitting record. Look to create high quality, and relevant content for your target audience, and be sure that you have conducted enough research before you start. Do you want to increase conversions, drive traffic to your website, or just to increase brand awareness? You’ll need to set your key performance indicators for your videos before you start creating and uploading, so you can measure just how successful your videos have been for your business, and know the exact return on investment that you have achieved.
Script your video
You might already know exactly what you’re going to say on your video, and even if you want your video to be really natural in tone and more like a conversation, it is a really good plan to write a script anyway. By writing your script, you can ensure the tone and choice of words are suitable for your audience. If you’re recording a beginner’s guide to using a product that you sell, you’re likely to want to avoid technical language – and if you’re recording something for your more expert customers, or you’re recording for B2B marketing, you will need to keep your choice of language appropriate.
Not only that, by scripting your video, if you get stuck for words once you’re recording you’ll be able to pick the pace back up again more quickly. You’ll also find it will help when you’re writing your transcriptions when your video is ready to be uploaded.
Storyboard your video
We’ll say straight up – this step might not be strictly necessary, and you don’t have to be an artist and produce something worthy of pitching to a movie executive. But we’re big fans of planning here at Avasam, because it can help you prevent things going wrong! A couple of quick sketches might be all you need, especially if your video is only a few minutes, and it needn’t take too long – just enough to help you, and anyone else involved in the making of the video are clear on the exact direction you want the video to take.
Prepare
Before you hit the record button, you’ll want to make sure you have everything you need sorted, and close to hand. That means you’ll check your camera has enough power in the battery, and there is more than enough storage on your memory card. Once you’ve done that, make sure you have your props ready, and be sure you have a glass of water on hand – you don’t want your throat to dry up halfway through!
Right before you hit record, if you’re going to be on camera, do one more check in the mirror – you don’t want to have to re-record because you had something on your shirt, or your hair was out of place.
When you start recording, take your time – it is clear when someone is rushing, is nervous, or is otherwise feeling flustered. If you’ve taken your time, and paused between sections, you can edit your video much more easily.
Edit your video
Talking of editing – once you’ve finished recording, it is likely that you will need to edit it for some reason. Did you say ‘erm’ too many times (we have all done it!) or perhaps you had a cough or sneeze that needs editing out? We wrote a huge post about the best free video editing software a while ago, so even if your production budget is zero you can still get a professional editing experience without splurging on Final Cut Pro.
If you don’t have a PC to work on your videos, or you need to be able to work on editing on the go, check out our post on the best mobile video editing apps. There are loads of options available, and you’re sure to find one that does what you need it to do!
Uploading
Uploading to YouTube on a regular basis is going to be important – but quality is more important than quantity. Posting a fantastic video that gets loads of watch time and likes once a month is more valuable to your channel than posting a low quality video that gets dislikes from your followers weekly.
When you’ve uploaded each video to YouTube, it is important to take the time to optimise your video. It doesn’t take long, but following our next advice will really help you to get your audience’s eyes on your video.
On your videos
These steps might seem like they’re time consuming and maybe a bit unnecessary, but they’re going to really help you get more views in the long term – so be sure to take a few minutes to get these in place. It will be worth it when you’re seeing so many more views, likes and shares!
Create titles that inspire watching
There’s a few things we know about YouTube users. They tend to use it as a search engine, and they will often find videos when they are searching on Google. That means you need to be aware of SEO when you’re creating your video titles. You have limited amounts of space to create a title that inspires viewers to click through, and that doesn’t make your video seem like it is click-bait.
- Titles should be between 60-70 characters.
- Don’t use irrelevant keywords. YouTube will penalise you.
- Use language that encourages viewers to watch.
- Keep titles balanced – aim for accurate and informative, but eye-catching. Avoid them being like click-bait!
How can you find keywords for your YouTube videos? Simple – start typing keywords into the search box, and then see what comes up as a suggestion. You can also use Google Trends, Google Ads Keyword Planner, and any of the other tools you might use for SEO research purposes.
Watermarking your videos
When you create your video, you’re going to want people to know who created it and how they can find more of your videos. You can easily make this happen by adding your logo as a watermark on all your videos, which will help increase brand recognition.
You can apply your watermark to all your videos, or you can apply it to none – that’s just the way it is. However, since it is just five easy steps to add your logo to your watermark, we don’t know why you wouldn’t want to use it.
- Ensure you’ve verified your YouTube account
- Open the Creator Studio
- Click Branding
- Click Add a watermark
- Select the image you want to use
Super easy! Not only will watermarking your videos help with brand recognition, it will also help to ensure that the numbers of subscribers increases too. When viewers move their mouse over the watermark, they’ll be prompted to subscribe – which makes it easier for them, since they won’t need to navigate back to your channel homepage. More subscribers equals more
Adding playlists
Ever listened to music on YouTube? Statistically, it’s pretty likely you have, and in which case, you will almost certainly have discovered the magic that is auto-play. YouTube creates automatic mix playlists based on what you’ve watched before, but you can create video playlists for your channel that can encourage your viewers to continue watching.
- Go to the video you want in your playlist
- Click the + icon
- Tap or click to create a new playlist
If you want to add the video to an existing playlist, follow the same steps and choose ‘existing playlist’ at step 3.
Why does it encourage viewers to continue watching? It is an effect known in psychology as loss aversion, but it is important for you as a YouTube content creator because it will keep viewers watching. And when they watch for longer, it’s going to encourage the algorithm to present your videos to more users.
Creating playlists has been proven to work too – the top performing brands are creating and promoting double the number of playlists as the bottom 25%.
Enable embedding
Depending on the type of videos you’re creating, you might be wanting to embed your YouTube content on your website – either by adding how-to, or product review videos on your listings, guides on your FAQ page, or on your blog when you’re talking about bestselling products. You might also want to embed them on your social media. Enabling embedding makes it easy for you, and for anyone else who wants to be able to embed your work on their website!
This is one of the easiest ways you can get free brand awareness, so it really does make sense to enable it. When you’ve enabled embedding, when viewers click Share (beneath the video window) YouTube will show them the Embed icon. All they need to do is copy the embed code and paste it wherever they want to add it.
These are the five simple steps to enabling embedding on your YouTube videos.
- Open Creator Studio
- Find the video you want to edit
- Click Advanced Settings
- Scroll to Distribution options
- Tick Allow Embedding
Like most things on YouTube, it’s pretty simple to get more potential shares and views. And when you get views, it is easy to work out where they came from too, by using the YouTube analytics.
Create thumbnail images
Thumbnail is the technical term for the preview image on the video. They’re placed there to help viewers to understand what the video is about. You can allow YouTube to create the thumbnail automatically for you, but creating your own custom thumbnail images will ensure that you can keep them on-brand for your business – you’ll be able to use the right fonts, colours and so on.
It’s well worth spending a few minutes creating custom thumbnails – YouTube say that over 90% of the best performing videos use them!
Technical details for YouTube thumbnails
- Use 16:9 aspect ratio (this is used most frequently in YouTube players).
- Use a resolution of 1280 x 720.
- The file size should be less than 2MB.
- Must be .JPG, .GIF, .BMP or .PNG.
You don’t need to be an expert graphic designer to be able to create professional looking thumbnails. There are loads of design tools that provide templates for social media channels, YouTube included. Once you have found the template you want to use, you simply need to be able to drag and drop your images, text and logo on. Check out Canva as a great place to start, but you might also try Adobe Spark, Easil or Picmonkey.
How do the experts create a compelling thumbnail?
- They use eye-catching backgrounds with plenty of bright colours.
- There’s evidence that suggests including close-ups of people’s faces on thumbnails leads to more people watching the video. It’s more friendly, and existing fans will be interested to know more about your brand – including you, and the members of your team.
- Use text overlays. Add short, interesting titles that complement the video’s actual title.
- Be subtle with your branding – depending on the type of video you’re creating, you might want to keep your logo discreet.
Add cards and end screens
You might add cards when you’re talking about a certain product in the range, and add a link to the listing – and why on earth why wouldn’t you want to make it as simple as possible for viewers to make purchases? Or you might add a card that takes the viewer to another one of your videos, or your other social media channels.
You can also add poll cards, which is another great way to get feedback from your fans. If you’re going to use poll cards, don’t forget to mention it when you’re recording the video so it makes sense.
Finally, add your end cards – these are like a closing slide on your video, which helps your video look professional and on-brand. You can add your calls to action here, and you can add any other links on here too.
- Log into your YouTube account
- Go to the YouTube Creator Studio
- Click Video Manager
- Click Videos
- Find the video to be edited
- Click Edit
- Add end screens and cards by clicking the buttons at the top of the page
Simple – they take just a few moments to add, and they’ve been shown to encourage further viewing – which is exactly what you’re aiming to achieve.
Add transcriptions
What’s the point of adding text to your videos, you might be wondering. People are watching the video, aren’t they? Well yes, they are – but they aren’t always watching with the sound on. Not only that, statistically you will almost certainly have viewers (who are potential customers) that have hearing impairments. You might even have international viewers who aren’t sure of a certain phrase, and for whom translating the text is easier than trying to understand it as you say it. By providing captions on your video, you’re enabling all those people to view and understand your video easier, and in turn you’re likely to find they will buy from you.
So how do we go about adding captions to our YouTube clips? Luckily, It isn’t hard, and if you’ve planned your script, it doesn’t take very long either. You need to create a SubRip Subtitle (SRT) file, including start and finish times. Here’s a quick guide to get you on your way:
- Open a text editor – either Notepad in Windows, or TextEdit for Mac are fine.
- Start typing your subtitles. Each subtitle will need three lines:
[Line 1] 1
[Line 2] 00:02:20:00 (hour:minute:second:millisecond format)
[Line 3] What you want on the caption goes here
This adds subtitle 1 (line 1) at 2 minutes 20 seconds, with the text you added on line 3. (don’t add what we have in the square brackets – this is just to demonstrate)
- Repeat the format until all your subtitles are in place, with the correct timings.
- Click File and Save As…
- Type your filename with the .srt extension.
- Click Save As Type and select All Files.
- Click Encoding and select UTF-8
When you’ve created your file, you can upload it to YouTube (or any other platform – if you’re uploading to Vimeo as well, for example). On YouTube, you’ll need to follow these steps:
- Go to YouTube Video Manager (in My Channel)
- On the video you’re uploading the subtitles for, click Edit
- Select Subtitles and CC
- Click Add New Subtitles or CC
- Select Upload a file
- Select Subtitle File
- Browse to find the file you saved
- Select Upload
- Adjust your subtitles in the transcript, or change timestamps by clicking and dragging the bar on each side of a subtitle on the timeline.
- Click publish
It might seem like it’s tricky and time consuming at first, but it really doesn’t take long, and once you have the hang of it, you’ll be able to bash them out in no time. The potential benefit for your viewers, and additional sales they might bring you, make it worth the effort!
You can also have YouTube add captioning to your video automatically – so if you’re really running out of time (or can’t be bothered to create your own captions – don’t worry, we won’t tell!) then you can do that instead. You can find out more about captions – both adding your own, and automatic captions – on this page.
Building the number of views
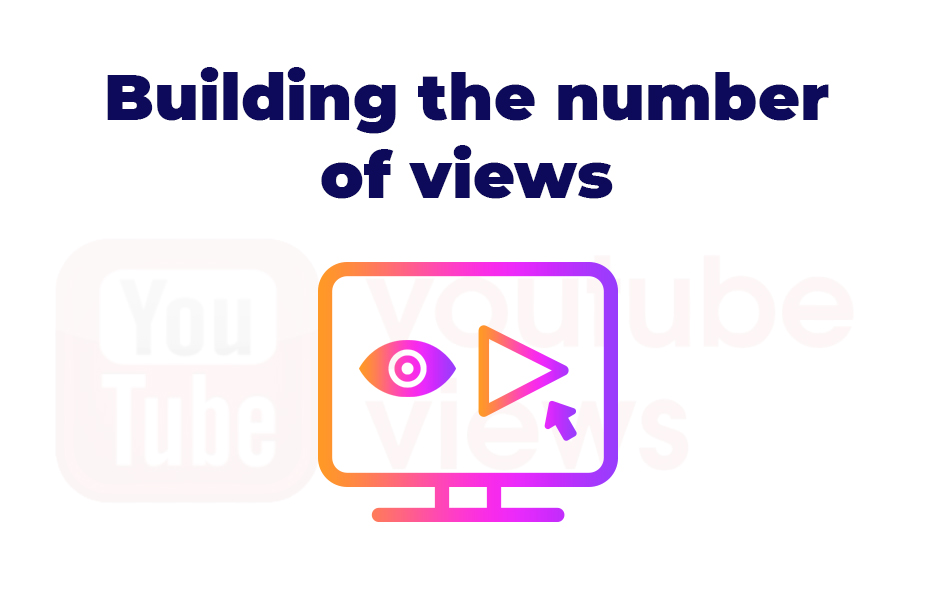
Once you’ve got your YouTube channel up and running, and you’re posting your videos regularly, it’s time to start building up the number of views your channel gets.
Know how the YouTube algorithm works
Since you’ve already built a successful business, you’ll be aware of the impact of good SEO on your website, and you’ll probably know about the impact of algorithms on social media channels. That means you’re probably looking for ways to work with the YouTube algorithm too.
Unfortunately though, the YouTube algorithm doesn’t select videos based on what the algorithm is programmed to choose, and there isn’t a way to work with it beyond creating great content that suits your target audience. It is based on what the user is most likely to watch and enjoy, and on what they are already following. What counts is what the user watches, what they click away from, how long they spend watching, what they click like and dislike on, and what they click ‘not interested’ on.
YouTube’s advice states that it’s better to create what your audience are looking for.
Instead of worrying about what the algorithm ‘likes’, it’s better to focus on what your audience likes. If you do that and people watch, the algorithm will follow.
So when you’re preparing your video, be sure to do your research carefully, and know what your audience are looking for. If you can get that bit right, the watches and likes that you need for your videos to be presented to other viewers will happen organically.
Growing your subscribers
Subscribers are exactly what it sounds like – people who have watched your videos and subscribed to your channel, because they want to see more from you. It’s easy for viewers to become subscribers, and they just hit the subscribe button. Since the algorithm is positively influenced by people subscribing, it is a good idea to encourage your viewers to subscribe as part of your video, by adding cards, and encouraging your followers on your other social media channels to subscribe on YouTube too. The more subscribers you get, (and the more you post and get likes for your videos) the more the algorithm will share your content as being suitable.
Cross-promoting your videos
We mention this a lot, but cross-promoting your videos everywhere else that your business has a presence online is a good idea too. That means mentioning your YouTube videos on your social media, and in your blogs on your website. If you’re doing email marketing, try embedding your YouTube clips there too. Don’t forget to promote your older videos on your other videos, just like you might link to a previous blog post in your most recent one.
Build your community
When you’re using YouTube to increase brand awareness, you might find that you start building a community – your biggest fans will interact with you regularly, and will start interacting with each other too. That’s an amazing place to get to, because you’ll find your fans will share your content on their other social media channels. You’ll want to nurture your fans, so when they make comments, reply! If you don’t have a lot of time, you can just say ‘thanks!’ or leave a little heart emoji.
Once your community feels that they are being listened to, they will start to make suggestions for new content, and ask questions that may help you to be able to define the direction of your future video content.
And while we’re talking about community – don’t forget to give if you want to receive! Follow other channels, leave comments and share – it doesn’t need to take up too much of your time, just a few minutes, every couple of days will be enough to build up some good will.
Buy views
While this will cost you, it is possible to buy views – legitimately, not using dodgy software! If you’re in a hurry to get your videos seen by more viewers, then this is an option that you can look at using. Systems such as Viewsta can get you the views that you need to get your videos picked up by the algorithm more quickly, at relatively low prices.
Building on your YouTube success
Once you’re creating videos and you’re getting a good number of subscribers and views, you might decide that is enough for what you want to do. But really, do you want to stop there? Of course not. You want to keep going, and keep your YouTube success climbing, so that you can keep the success of your brand growing too. We’ll take a look at three things that can help you keep your YouTube success increasing next.
Using YouTube metrics
Whatever marketing efforts you decide to implement in your business, you’ll be looking to ensure you’re getting the best return on your investment. Even if ‘all’ you are investing is your time, that still counts – because you could be using your time in other ways to grow your business!
The reason you decided to start creating YouTube videos for your business will influence the KPIs that you will have set yourself, and which metrics you decide to consider the most important.
- Watch time – this is how long viewers spent watching your video. Find this in the Watch Time Report.
- Average percentage viewed – this is the percent of each video that your viewers watched. See this in the Watch Time report.
- Average view duration – this is the total watch time, divided by total number of plays. This is also in the Watch Time report.
- Audience retention – this is the percentage of viewers who watch and leave at moments throughout your video.
- Re-watches – this is the number of times viewers re-watch your videos. If your video gets lots of re-watches, consider whether this is indicative of a successful video – or if there was something that wasn’t clear and prompted your viewers to watch a section of your video again.
- Engagement – this is the number of comments, shares, likes and dislikes. You’ll see this in YouTube’s Interactions Report.
- Impressions click-through rate – this measures how often people start watching your video when they see it on their homepage, on recommendations or in the trending section. You can see this report in Analytics.
- Card click-through rate – you’ve added cards to your YouTube videos – it makes sense to! This metric tells you how valuable your card has been, which can help you as you create future cards. Access this in the Cards Report.
- Playlist engagement – YouTube’s Playlist Report helps you understand the number of views per playlist, and help you to optimise your playlists.
- Unique viewers – you want to be sure your viewers aren’t all your mum or dad showing their friends, don’t you? You can understand exactly how many individual people watched your videos with this metric. See this metric in Reach Views, in the Audience tab in YouTube Studio.
- Views per unique viewers – this metric tells you the number of times the average viewer watched your video. This is useful to know – because you’ll be able to tell how many people really love your videos! If you find high views per unique viewer but lots of dislikes, it might indicate that your videos aren’t clear, or you might have offended a certain section of your audience. If this is the case, be sure to check the comments so you can identify what has gone on, and how you can avoid the situation occurring again.
- Demographics – you want to know if your intended audience is watching – and the demographic information can help you discover this.
- Subscribers – YouTube’s Subscribers report shows you which videos, places, and time periods gained and lost you subscribers.
- Traffic Sources – this metric is useful if you enabled embedding on your videos. You’ll be able to find out where your referrals came from in this report, as well as where and when.
- Keywords – in the Search Report (in Traffic Sources) you can find out what viewers are searching for when they viewed your videos. That can be really useful when you’re planning your future video content!
Observing trending and viral videos
As we found when we took a look at the most viewed videos on YouTube, the majority of the biggest YouTube successes are music videos, or videos for children. Assuming you’re not Ed Sheeran or Katy Perry (or an amazing animator) then you’re unlikely to be able to replicate the success of the biggest YouTube videos of all time, but that doesn’t mean you can’t learn from them – and other YouTube channels from your niche. Taking inspiration from, and perhaps even paying homage to viral videos will encourage more sharing, which can help you increase brand awareness.
Keeping an eye on videos from your industry, and definitely watching videos that your direct competitors are putting out will allow you to make sure you are creating content that your audience want to see. You might think you’re supporting your competitors when you watch their videos, but as Sun Tzu states in The Art of War “know your enemy”! Watching your competitor’s videos and comparing them to your own will allow you to identify opportunities to make videos that are likely to be successful before other YouTube content creators. This will help you establish yourself as an expert in your field, which will lead to more shares, likes and subscribers, which will help the YouTube algorithm know to put your videos first when users are looking for similar content.
YouTube developments
You’re probably well aware that Google have owned YouTube since 2006 – which means that they have enormous expertise, as well as gigantic budgets to evolve algorithms and develop the user experience. Just like your SEO is very different today to what it was a few years ago when keyword stuffing dominated web pages – so YouTube’s rules change from time to time.
Keeping aware of the most recent developments is a must if you are using YouTube as a channel for your marketing, so it is worth subscribing to the Official YouTube Blog, as well as any of the other amazing resources that talk about YouTube and other video marketing.
YouTube might be absolutely chock full of videos from brands already, but that shouldn’t put you off creating videos for your target customers.
- Always create videos with the needs of your customer in mind – the algorithm prioritises content made with the target audience in mind
- Video content doesn’t need to cost a lot – you can edit your posts effectively using free editing software
- Optimising your video might take a bit of time but it is well worth the effort to do so
- Always cross-promote your videos and social media on your different channels
- Make use of the YouTube metrics to measure the success of your videos, and to learn what works (and what doesn’t!)
If you’re using your YouTube channel to promote your DropShipping business that uses Avasam, or your eCommerce business that could benefit from adding DropShipping, be sure to subscribe to the Avasamsocial channel. We’re posting pretty regularly, and there’s a good chance that we’ll give you a follow back!
This post contains affiliate links. If you use these links to buy something, we may earn a commission. We only use referral links for businesses that we would use ourselves. Thanks for your support!
This post contains affiliate links. If you use these links to buy something, we may earn a commission. We only use referral links for businesses that we would use ourselves. Thanks for your support!

DropShip products from verified suppliers to diversify your inventory and scale your eCommerce business