Image resizing and optimisation for the best eCommerce experience
The biggest lesson that we can learn is that eCommerce happens everywhere – On a train, the tube, in the passenger seat of a car, waiting for a film to star at the cinema – Even at the dinner table, or at bedtime. This means that we need to be aware that not everyone is on Wi-Fi – and that they may be sharing a limited connection. Many of us have become used to fast fibre or ADSL internet at home, and 4G (or even 5G) and Wi-Fi when we are out and about that we can assume everyone has such luck.
Unfortunately not. There are many, lucky parts of the world where they have great options for fast access, but some areas, including parts of Europe and the US, have 3G if they are lucky, or sub-2mb/sec connections. Therefore the size (and quality) of the images you use is a concern. Most people still expect a fast-loading listing or page, used as we are to instant gratification – especially those browsing on mobile devices on the way to/from work and at other times.
With the median website size for desktop browsers standing at 2080 kb of (up 39.3% since 2016), and 1885.2kb for mobile websites (up 55.9%), there is a need to better manage the assets you use rather than depending on technology to increase connection speeds. Images cannot wholly be blamed for this, however, with the median desktop page transferring 1026.3kb (up 24.6%), and the median mobile page transferring 935.5 kb (up 53.1%). There’s also the increasing use of video content, of course.
In fact, 64% of smartphone users expect a website to load in 4 seconds or less – 47% expect them to load in 2 seconds or less! And with people wanting nice, big, clear images of the products they are buying, it’s really important to make sure those image files aren’t slowing your site down unnecessarily – 79% of people that expressed dissatisfaction with the performance of a website when buying from it made it clear they wouldn’t come back and buy from them again, so they are unlikely to recommend you, either. How to find the right balance, though? The files need to be small enough to load quickly, but it should be clear enough to be attractive, and to let the customers see what they need to see, depending if they are for use in the background, the interface, or to illustrate your brand’s identity and its products (‘hero’ images).
Images
If I make an image bigger in size to retain or show more detail, doesn’t that make the image file bigger?
Not all image files are equal. And a lot of that comes down to the different image file formats – they all have their ups and downs, and the trick is to choose the right one for the purpose. This may seem overly complex, but often it is constrained by which ones are supported by the web browser(s) you’re developing for.
In theory, smaller is better – smaller files can be downloaded quicker. But you also want them to be clear and show details, so that people can zoom in, verify the product is right for them, and ask less questions before buying. More detail means bigger files though. There must be a suitable balance, surely?
What’s the difference between the size/dimensions of an image, and its level of detail?
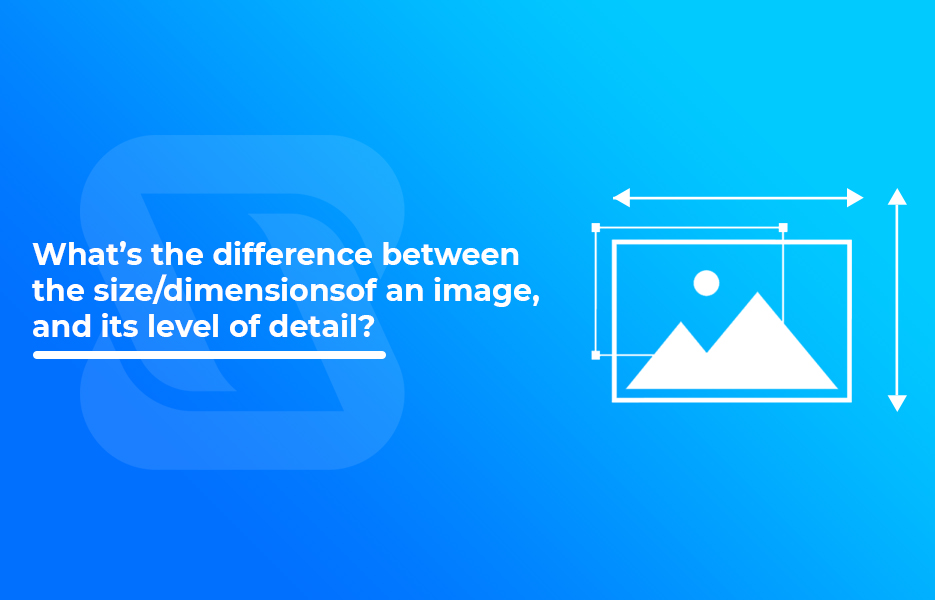
The image has a size, usually measured in either pixels (picture elements, the smallest item that is stored, a blue square or a red square, for example) or as a more conventional size (9 inches by 6 inches, for example).
It also has a resolution – This is usually expressed as a number of pixels per measure of distance (inches, centimeters, millimetres….) This tells you how much detail the image contains, and how ‘big’ it is, in terms of the number of pixels it contains.
Some image file formats contain more colours than others – a GIF file uses only a maximum of 256 colours (these are specific to the image, so the ‘palette’ will vary from image to image), while a JPEG contains potentially millions of different shades, since it uses a 16-bit number to store its colours, for example. The more colours in an image, the more realistic it can appear – In real life the sky is not just one shade of blue, for example. Therefore the number of colours it can show contribute as much to the resolution and physical size of the image as the number of pixels.
You can also specify the size the image appears when it’s displayed, of course. Therefore a ‘big’ image may only appear small on the page, relatively speaking, but may contain a lot of detail, or more accurate colours and smoother gradients. Don’t assume an image is small because it looks small on the page.
What is a ‘good’ resolution to use?
A commonly recommended image resolution for web pages is 72 pixels per inch, based on it being matched to a common level of detail in screens to avoid details not being clear. If the image is physically bigger than the apparent size it is initially displayed at, it can be shrunk to fit by the browser, or you can have a smaller version to display (A thumbnail), and load the larger image only when the thumbnail is clicked. Newer, high resolution screens may mean this is no longer as appropriate, of course. If you’re expecting people to be viewing on mostly k (or even 8k) screens, then you may want to look at a higher resolution.
For printed material, ideally you should go with 300 dpi (for image purposes, this is basically the same as ppi). This is presuming you’re doing imagery for brochures, pamphlets, etc. If you’re doing large banners or bigger yet – Talk to a professional and get a recommendation on the size AND resolution of the printer they use!
What is image compression?
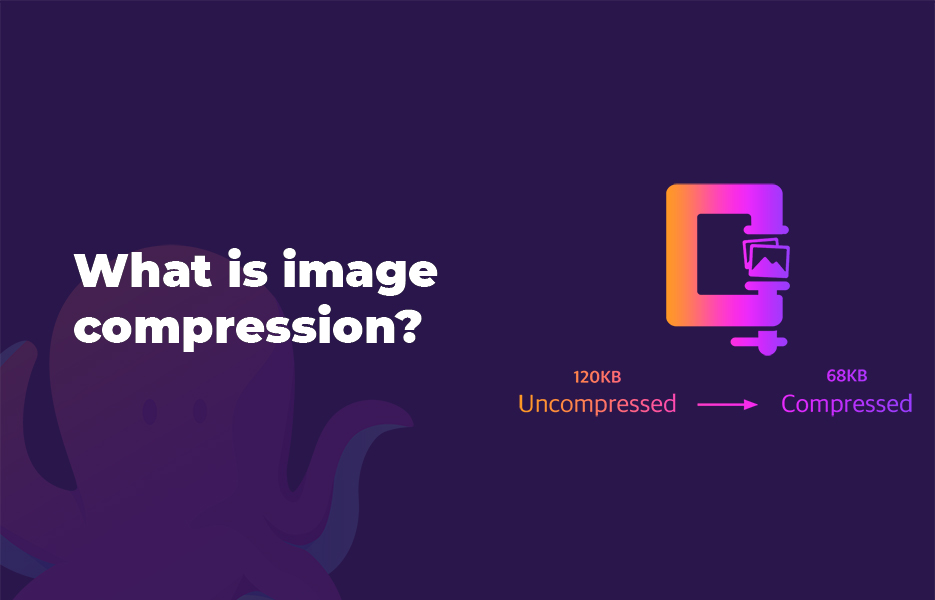
Different image formats may be ‘lossless’, or ‘lossy’.
Lossless
An image format may preserve all the detail captured in the original image, while taking up a given amount of space (it may not be compressed, of course, to make sure, thus it stores information about the colour of each pixel in the image separately). This often means, however, that when you keep zooming, you will reach the point where you can see individual pixels and lines will seem jagged, or stepped (‘jaggies’)
Lossy
An image file might make itself smaller in file size by using some form of compression to reduce how much information it needs to store about an image. Where image files store colours as numbers, so you can associate a shorter term with the unique colour(s) present and keep a lookup table, reducing the amount of information per pixel for colours that are used lots, for example. You might further save space by ‘approximating some very subtle colour differences to a single colour.
Another option is to use mathematics to approximate the image – ie. Make the image look very similar to the original, but lose some detail if you look closely. Often there will be degrees of accuracy that you can specify when converting an image too this format, whether at first save or later.
What are the main image types to consider?
Each different format stores images differently – Many use compression in some way, so they don’t store information about the content of each spot on the image, or allow for you to zoom in without ‘jaggies’ (when you zoom in further than the resolution, getting stepped or jagged edges caused by the individual pixels, or squares of colour that make up the image when they are very small).
BMP
A bitmap (.bmp) file is one of the largest formats for a given image size. This is because it’s a lossless format – It stores a colour value for each individual pixel. You’ll rarely see them used online for even moderately large images because of this – they’re just too big!
RAW
RAW files are very big – They’re generally used by professional DSLR cameras and other high resolution imaging equipment. For this reason, they may also be referred to as ‘Camera RAW’.
They contain ALL the information the camera took in, including all the information about the light levels etc. This means that, uniquely, you can adjust things like the exposure and the white balance of the image AFTER it is captured. Most image editors won’t load RAW files, but many of the leading ones will, and it’s becoming more common, as more people have access to ‘pro’ level equipment – In fact, many high-end mobile phones will even take images in RAW format (If you have enough space!). Samsung mobiles have an option in the camera app to save both RAW and JPEG versions of the same image if you’re shooting in ‘Pro’ mode. Don’t like how the phone app optimised the image? Load the RAW file in Lightroom, Photoshop or another app and review it to get a better outcome.
Because they contain all that information, and make no compromises over the original picture, you’ll always get better printouts. But you’ll rarely see them on a webpage, as most web browsers don’t’ support RAW. Windows 10 does though, as of the May 2019 update. You can download an extension to view (but not edit) them in the Windows store. Be aware it doesn’t work with the RAW images from all cameras, but it’s improving.
GIF
Graphics Interchange Format, or GIF, is a lossless image format which maintains smaller file sizes by only having a limited palette of colours. It can only contain 256 colours, though these don’t have to be continuous – They are picked when the image is saved to give maximum fidelity. For this reason, the files are small, but photos tend to lack detail and look ‘odd’ because there are fewer smooth transitions between areas of different colours.
GIFs support transparency, but also animation – they were an early web-focused image format when connection speeds and bandwidth were lower, so were a deliberate compromise.
For this reason, GIFs are most commonly used for icons and control elements – Limited, but optimised colour range allows for smooth colour gradient if you want them to seem to be 3 dimensional, and animations can be used to allow them to be part of ‘active’ pages, while not taking up excessive space or slowing down data transfer.
There are other options today, but they still have their place – GIFs are smaller than BMP files or RAWs for example, but are sometimes bigger than JPEGs. Their issue can often be with their quality.
An interesting quirk of GIFs is that horizontal blocks of colour compress better than vertical blocks.. GIFs also have an option for you to save them as interlaced images. This means that, when loading the image, it first draws the ‘even rows, then the odd rows fill in, so it loads quickly, but blurry, then gains it’s full level of detail, as if coming into focus.
SVG
Unlike many formats covered in this article, SVG files aren’t bitmaps (storing information about the colour of each pixel). Instead, SVG files are a vector format – meaning that they store the information to draw an image, rather than the entire image piece by piece. This does make its files relatively small, though.
It’s particularly popular with UI designers, and people creating logos, charts etc – It uses an XML-based language, similar to HTML and is particularly suited to store images created in Illustrator, Sketch or Affinity Designer, rather than photos, for example. Because it’s vector-based, it can be zoomed pretty much infinitely – The program displaying it just recalculates and redraws it.
What you CAN do, however, is embed other images within it – These won’t zoom infinitely, but can help to produce elements that are more ‘natural’. Not every page can use SVGs – It’s not unheard of for platforms like WordPress, Tumblr or Medium to simply convert it to another format like a JPEG, so check before you use it.
JPEG/JPG
JPEG (and JPG) are the acronym for the Joint Photographic Experts Group, who formalised the specification for this image standard – Both are correct, but most people use ‘JPG’ as that’s the extension you will see on the file.
JPG is good for displaying photos, and other images with lots of colours and gradients. This because it’s a ’16-bit’, and can store millions of different colours and shades. – Obviously this increases the amount of space a JPG takes up, but the format includes image compression – When you save a JPG file the first time, you can choose the percentage a file is compressed based on image quality, where 100% is no compression, and 0% is maximum compression and minimum overall quality. It’s usually somewhere around the 65-75% mark as a balance, though the image itself will define what is and isn’t acceptable based on the final result.
You would usually use JPGs for the final image to be displayed, and save in a lossless format separately in case you need to later edit further, to preserve quality. Use them for product images and other photographs, as well as ‘hero’ banners that will be the focus of attention. Don’t forget though, that JPEGs may not be great for diagrams or schematics – Consider an SVG or similar.
TIFF
Tagged Image File Format (TIFF) is a lossless format, and therefore is more focused on image quality than manageable file size. This makes them popular with the print and publishing industry, and photographers. While TIFFs CAN contain some information in JPEG format to optimise size, it is more common not to do so.
As such, they are rarely the best option for web pages, unless they are stored with a thumbnail in a different format to link to and preview them for download.
TIFF files are better for use in printed material, or documents that require quality at the expense of file size. Because TIFF files support layers, transparency and other editing features that make them a good intermediary format where and your team are using more than one image editing programme.
In balance, you can store and edit images using them, but save them in other formats more appropriate when adding to a web page.
PNG
Portable Network Graphic, or PNG files are a newer, lossless format designed for online use, to maintain a balance between files size and image quality. It also supports transparency, making it useful for controls, and other elements that may be displayed on a range of backgrounds.
Because they are designed to maintain clarity, they will typically be a larger file than a JPEG (or especially a GIF), but maintain their quality better.
There are actually 2 versions of the PNG file :
- PNG-8, which uses 8-bit numbers to store colour, and therefore is limited to a maximum of 256 colours. This is intended to act as a direct replacement for GIFs, and are good for controls and icons, etc.
- PNG-24, which uses 24-bit numbers to store colour information, meaning effective ‘real’ colour. This is intended to store photos and artwork.
PNGs are often preferred for logos because of their high image quality, support for transparency, and the option for a smaller file with a limited palette from PNG-8.
Using images correctly
It’s important to bear in mind the above information, not just for the type of image you use, and the size, but also the purpose of it. Don’t be afraid to use different formats for different purposes, and to avoid having to ‘reinvent the wheel’. Data storage is relatively cheap now, so you can justify holding multiple copies for different purposes.
Editing and printing
It’s often good to keep an original image in a lossless and high detail format to fall back on – The original RAW from the camera in the case of photographs, where possible, the PSD or TIFF for artwork, or an SVG. This means that, should you need to rebuild something, the original assets can be used and the quality of the final image maintained.
High resolution versions of final designs should also be preserved in case you want to use them for printed material like handouts later. For the extra minute or 2 it takes, the time saved later can be invaluable. It’s good to have options!
In web pages
For web use, especially in eCommerce, you need to consider the purpose of an image. Humans are very much oriented on visual stimulation for reassurance online – They want to see before they buy, if they can’t try.
This means that, ultimately, you want large, clear, high resolution images with lots of detail (and from multiple angles if possible!).
This takes up space, of course – Consider trying to save your images with several different formats and settings, and take the best balance of quality and size. This might mean 1 item with 6 images has 2 or 3 different formats – The user won’t know!
Take a pointer from marketplaces like Amazon and eBay – Don’t just put the images on the page in high detail, and change the size it’s displayed at to make it fit until they open it at full size. Create and optimise smaller, lower detail thumbnails for the item page, and link from them to open the full image, or images, in a separate window. This reduces the load time of the main page, and gives the customer a better experience by letting them still have access to zoom in and scrutinise the details of the product from the safety and comfort of their own home – Or a tube train!
What about a responsive page?
Responsive web page design involves having pages that load and display themselves differently based on the device being used to view it. Therefore you can have more than one version of the image that will be shown for smaller screens, like smartphones, medium sized images for small or mid-sized tablets, while desktops or laptops with big, 4k or even 8k screens are much less forgiving on shortcuts in quality – Hopefully the users will be a little more patient!
Step by step
So what are the main steps when optimising your image, independent of the tool used?
- Check with the designer what the desired size of each image/element should be for the final page based on their design documents and layouts.
- Do you NEED that image? Does it need to be animated? Discuss with the designer whether a single background image can do the same job as multiple images ‘layered’ on each other. More images means more space.
- Ensure the image is the right size (dimensions and resolution) for its target location and medium. Consider if the image might better broken up into a couple of smaller images if only part of it is very complex, and rearranging the layout.
- Consider the image, its content and its use when deciding on a target image format. Choose an appropriate option for colour depth, type of image and so on.
-
If the file format supports compression, be cautious at first. Don’t be afraid to save/create multiple versions so that you can ‘go back’ – Quality can be as important as compression at times. Many tools will have quick presets to make this stage easier:
a. Maximum detail
b. Very high
c. High
d. Medium
e. Low - Don’t be afraid to try another tool to see if another approach saves a bit more space – A specialist tool like JPEGMini might have a few tricks that even a professional using Photoshop doesn’t!
- Consider reviewing other file formats (PNG vs SVG for example with logos).
- Try it on the page, and get someone else to review it. Don’t be afraid to take feedback and return to the start.
Image optimisation tools
There are many tools available that are either dedicated to image optimisation, or simply include it as one of their features. We’ll look at a few different design software programs below, and some of their features. Some are specialised, while others are more general image editing apps that also allow for resizing and optimisation.
JPEG Optimizer (Free)
As you can guess from the title, JPEG Optimizer doesn’t work on GIFs, PNGs, or other file formats – Only on JPEGs.
It works one file at a time, and lets you resize the image in the file, and to choose the compression level to reduce the physical size of the file, but at the expense of quality. This lets you quickly apply changes to the file and evaluate the changes, working in small steps to avoid going too far. Many small changes instead of making a big mistake!!
ImageRecycle (15-day trial, 100Mb limit, $10 for 1Gb, $20 for 3Gb, $50 for 10Gb)
ImageRecycle is a web-based tool/service to automatically compress/optimise JPEGs, PNGs, and GIFs (Also PDF files!).
It’s a drag and drop service, no fiddly controls, so ideal for the less technical user, or people in a hurry, and it gets great feedback for its standard of results. It also has extensions and plugins for WordPress, Joomla and Magento.
It’s a subscription service, based on the size of the files you put into it (not the smaller ones that come out!). There’s a free trial when you first sign up, lasting up to 15 days OR 100Mb of files (whichever comes first). After that, you can buy credit by space. This should give you great results and value for money of you’d rather not spend time tweaking the images yourself, just make sure they are the right size first!
Tiny PNG (Free)
Working with both JPG and PNG files, Tiny PNG has been around for a while now. Another drag and drop web tool, it can accept up to 20 images at a time, but they cannot be any larger than 5Mb each– This shouldn’t be an issue, hopefully!
The resulting files can be exported to Dropbox if you don’t want to just save them to your PC, and they also offer WordPress and Magento plugins.
GiftofSpeed (Free)
GiftofSpeed works with JPG and PNG files, and offers more options to you to fine tune the adjustments it makes. It supports resizing too, with scaling options for height and width. It can process multiple PNG files at once, but JPGs must be uploaded and processed one at a time.
JPEGMini (Free trial, $59 for JPEG Mini Pro app, $89 for app and plugins)
“Don’t compromise image quality” says JPEGMini on its site. It offers a slider to demonstrate what chages in quality you can get alongside image size changes when you optimise it. It’s only for JPEGs, of course, but it’s a useful tool. It also has a plugin got Adobe Photoshop and Adobe Lightroom.
PNGGauntlet (Free)
PNGGauntlet is an app designed to output optimised PNG files. It can accept JPG, GIF, TIFF or BMP files, and is tweakable and configurable. It even uses three different tools for the optimisation, to ensure it covers all the bases (PNGOUT, OptiPNG and DeflOpt). It even has an “Always convert to PNG even if they are larger” option, just in case you want PNG more than you want the smallest files!
Paint.NET (Free)
Paint.Net is a lightweight alternative that is suitable for basic editing and optimisation of images. It has a clear interface, and is compatible with a wide range of image formats. It supports layers, plugins and a number of other common and moderately advanced tools, and has an interface which is clean and easy to use. There are lots of tutorials and ‘how to’s, as well as many built-in effects.
Unfortunately it lacks a number of features, like custom brushes and layer masks among others, but it might be the right tool for you. Being free, it’s easy to download and install it, so you can try it and be sure.
Corel Paintshop Pro (Paintshop Pro, £69.99, Paintshop Pro Ultimate £89.99)
Corel are a long-term competitor of Adobe’s, and are well known in the professional space for their ‘Corel DRAW!’ publishing and design software. Originally published as Paintshop, by JASC software in 1990, it was bought by Corel in 2004.
Paintshop Pro can be used in ‘Manage’ or ‘Edit’ modes – Manage mode is similar to Lightroom, and designed to help you review and organise large numbers of images, including tools like a People Finder, and the ability to bundle images into ‘collections’. Edit is more akin to Photoshop, and focuses on one, specific image to edit and adjust.
Paintshop Pro saves image in its native ‘PSP’ format by default, though it can read or write to all major image formats. Paintshop Pro has a ‘Lab’ interface for opening RAW image files. It has options for colour correction, uncovering/recovering detail by changing colour balance, and also correction for lens distortion, but these tools are less capable, understandably, than the Photoshop or Lightroom equivalents. There are extensive help offerings for Paintshop Pro, including Video tutorials and the in-line help panel.
Serif Affinity Photo (£48.99 Mac & Windows, £18.99 iPad)
Affinity Photo was first developed and released by Serif in 2015, and is made available at a very reasonable price for a feature packed solution for a one-time payment, which may be more appealing than an ongoing Photoshop subscription. Its part of Serif’s Affinity suite of programmes, currently comprising Photo (released 2015, Designer (released 2014) and Publisher released 2018).
Affinity is a fully-featured photo editing app, just like Photoshop, supporting all the mainstream features, PSD and PSB files (seamlessly), importing PSD smart objects and edit the layers, RAW image editing, retouching, layers and filters as well as all major image formats.
For beginners and more advanced users, Affinity has some very good help content, and there are an increasing number of courses, YouTube videos and other resources. There is also an Affinity Photo Workbook that can be purchased from their webstore for help and inspiration.
GIMP (Free)
GIMP (GNU Image Manipulation Programme) is a free, open source alternative to Photoshop. As an Open source programme, updates are a little slower, and the interface isn’t as slick – But it’s free, and bugs tend to be fixed quickly, as it has a thousand times as many people working on it as Photoshop.
GIMP might lack some of the more advanced tools, but it covers the important functionality, for image editing and optimisation. In addition, with a Linux version, sometimes it can be used on hardware that Photoshop isn’t suitable for when doing basic image editing – It’s much less memory intensive.
GIMP supports many of the standard image editing and manipulation, including layers, filters and plugins (though there are more available for Photoshop). It loses out in some ways, though – Professional users might miss CMYK colour support, for example, and non-destructive photo editing, though these are in the planning stage. GIMP supports all the major image formats discussed in this article.
Adobe Photoshop (Various Creative Suite packages, from £9.99 per month)
Adobe Photoshop is 30 years old, now. First released on February 19th, 1990 after 2 years of development on Macs only, Photoshop has become a verb, like ‘Hoover’, for using a digital image editing programme to manipulate an image. That also means it can be used for more basic tasks, like image resizing and optimisation. It isn’t the only option in the Photoshop family, though. You can also get Photoshop Elements, as well as Photoshop Express and Photoshop Fix on mobile (iOS, Android). Photoshop saves by default in PSD or PSB files, which are lossless and save the actions taken, allowing things to be undone later, but it is also, as the industry standard photo and image editing programme, able to support pretty much ANY image format you can think of, and a few you might have to Google.
Adobe Lightroom(Various Creative Suite packages, from £9.99 per month)
Adobe Photoshop Lightroom (or just ‘Lightroom’) is a specialised app or family of apps that started with just one product in 2007, and has progressed to versions being available on iOS and Android as well as Apple TV (tvOS). It’s specifically focussed on image organisation and optimisation. It can’t doctor and manipulate specific elements like Photoshop, instead it’s focussed on organising, tagging and sharing them, with adjustments like colour balance and other optimisation to improve their appearance and suitability.
Lightroom also lets you organise and easily work with large numbers of images, such as after a busy day at a photoshoot, or out and about doing nature photography.
With Google focusing on mobile performance in its indexing criteria, the size of your site and the files that make it up are a vital factor in getting your pages in front of users alongside other SEO tools and concepts. And images ae a valuable tool in persuading a customer to buy from you, and show them the quality of your products.
Therefore it’s important to remember that you should use the right image format for the job – Lossy, or lossless? Do you need transparency support? How many colours? Don’t forget to keep your original images in a safe place, just in case something you try doesn’t work!
Don’t be afraid to experiment a little, or to question if all the images requested are needed – Design is part of the process, but so is making it usable, and making it more likely people will visit and using the page.
Don’t assume you have to use a single set of files – You can use different versions of the file in different sizes or resolutions depending on the page purpose, or where it is in the customer journey.
Find the right tool for the job. If you’re already experienced and using an advanced tool like Photoshop or GIMP, then you can do optimisation in the same tool. If your team has a mix of experience, or your image creation is outsourced, there are tools that will do most of the optimisation for you, to save time. With so many free option, then don’t be afraid to try a few.
Overall, never lose sight of the objective of the sight, and optimising the images – To persuade someone that they want to visit the page, and buy your products – Otherwise, how are you paying your team, your server hosting (or marketplace fees) and your marketing bills? Don’t lose your way.

DropShip products from verified suppliers to diversify your inventory and scale your eCommerce business